23.02.2024
Templates for cutting out paper for a new one. New Year's templates for cutting paper for windows
Volumetric decor creates a festive atmosphere in the room. How to choose paper decorations suitable for windows?
Choosing paper window decorations
Garlands, snowflakes, three-dimensional paper figures add a festive atmosphere without overloading the interior. Window decorations can be flat or three-dimensional and made from various types of paper. Flat accessories stick to the glass surface without taking up space in the room.

The shapes, sizes and colors of paper New Year's toys depend on the area of the room, the size of the windows and the level of illumination. Window decorations should not interfere with the passage of daylight; otherwise, the style is limited only by the imagination of the apartment owners.

Traditional “snowflakes” cut out of white paper are a quick and inexpensive way to add a festive mood to your room. Various types of creative materials are suitable for more sophisticated accessories: voluminous crafts, figures, garlands.
Types of paper

Catchy New Year's decor is created from designer paper, the surface of which imitates various materials and is covered with sparkles, fibers, and patterns.
Dense for large elements
- Traditional white paper has different levels of density, glossy or matte surface. Crafts made from this material will suit any room in any color scheme and convey the “winter” flavor of Christmas decor.
- Mulberry (mulberry) - dense translucent sheets, from which it is convenient to cut out shapes using a stencil. For example, miniature snowdrifts or imitation wreaths made of spruce branches.
- Craft - a dense material in a coffee-with-milk shade for creating massive objects. The texture imitates “gingerbread houses”.
- Corduroy is covered with thin fibers, and from a distance it resembles fabric. This material adds texture to simple forms. For example, small Christmas trees cut from corduroy texture look catchy and will suit any interior.

Make a “gingerbread house” from craft paper and decorate the windowsill
Thin for small crafts
- Rice - thin and textured, reliably imitates a layer of frost, snow or ice on the windows. Shapes from it are suitable for decorating window glass around the perimeter, creating the effect of a frosty pattern.
- Italian corrugated - for creating garlands and adding New Year's flavor to window cornices.
- Ecolux is a thin material with a pronounced texture, similar to crinkled silk, often has a holographic effect. Ecolux garlands include small elements of simple shapes (circles, diamonds, snowflakes), which look unusual due to their texture.

There are quite a few varieties of designer paper; when choosing a material for large, simple-shaped jewelry, it is better to choose denser options (kraft, mulberry). Small elements are made from pronounced textures (corrugated, ecolux).
The finished decor is fixed to the cornice, window sill and window glass surface; several types of crafts are combined to create a harmonious composition.

Types of window decor

New Year's accessories are glued to the surface of the glass, installed on cornices and window sills, and also hung on both sides of the opening.
Flat glass decorations
Traditional paper decor - snowflakes, figures of Father Frost, Snow Maiden and the symbol of the year, cut out using stencils. Manufacturing does not take much time; the beauty of the crafts is given by the non-trivial shape, textured with bright colors.

The size of the paper figures depends on the number of decorations and the size of the window: an abundance of accessories is appropriate in spacious rooms with large openings. Miniature flat objects in bright colors are suitable for decorating small rooms.

Volumetric decorations for cornices and window sills
Openwork snowflakes, garlands of paper balls, flowers, animal figurines can be made with your own hands from simple colored ones of different densities. Popular techniques for making such items:

- Origami is a traditional option for creating elegant crafts from one sheet of paper. New Year's origami toys are small in size; catchy, elegant options are created from textured paper covered with glitter.
- Quilling is a technique for creating toys and figures from thin sheets of different colors. The color range of toys is very diverse.
- Kirigami is a technique for gluing structures from stencils. Several elements are cut out from a dense monochromatic material, combined into a three-dimensional composition and installed on the windowsill.
- Decoupage is a technique for creating eye-catching New Year's accessories. Each item is based on a stencil made of thick paper, which is pasted over with pieces of material with a pattern. Decoupage toys look good in eclectic interiors and combine with the loft style.
- Papier-mâché is a method of creating paper decorations from several layers of material soaked in glue. The figures are placed on the windowsill, sometimes added to garlands.

Hanging window decorations
Garlands are attached to cornices, window sills, and window panes.

- The traditional version consists of elements of different colors or sizes that are attached to a thread. Such paper garlands in various styles can be placed on any part of the window; they can be easily combined with other decor.
- Completely paper garlands consist of individual elements glued together. A popular option is a chain of separate paper rings threaded through each other.
- Designer garlands are complete compositions of several elements, catchy and original. The remaining decorative items are chosen in neutral shades.

Features of window decoration
The harmonious arrangement of paper garlands, figurines and other crafts on the window creates a festive composition. The design of window sills, glass and cornices has its own rules.

Jewelry color scheme
Craft paper comes in a variety of textures and colors, so decorations can be made in any style.

- Traditional white snowflakes and voluminous garlands are a universal way to decorate a window. Monochrome items look great with LED backlighting in warm shades.
- The natural color scheme of New Year's decorations goes well with a laconic interior in a modern style. Sand, gray and green shades, complemented by shiny elements and intricate shapes, will decorate the window without overloading it.
- The catchy color scheme used in the industrial production of paper decor is not suitable for every room. Bright, shiny snowflakes and garlands should be combined with the shade of window curtains, wallpaper, and other furniture. Otherwise, the interior looks overloaded.
- The combination of companion colors in paper accessories creates a bright but discreet style. Designer Christmas toys are available in home accessories stores; you can make them yourself if you choose the material in the right shades.

Decorations in neutral shades made of textured paper with imitation textiles (wool, silk, cotton) are suitable for classic interiors, rooms in Provence or Norman style. This decor does not distract attention from the rest of the interior.

Placing accessories on the window
The location of the elements in the window opening depends on their size, material, and the level of illumination in the room.

- Large bright accessories occupy the central part of the window. These can be crafts in the form of Christmas trees and balls, figures cut out from stencils, or entire compositions.
- The background decor is colored paper garlands and snowflakes cut from simple white materials (coated or rice paper).
- Small voluminous decorations made of textured paper complete the composition and add color accents.
Symmetrical placement

Large New Year's toys occupy the central part of the window, the side surfaces are decorated with garlands located along the frame. The design of the cornice and window sill is symmetrical; it visually completes the composition. This arrangement requires a large number of background decorations in soft colors.
Central placement
Windows in small rooms are decorated discreetly, often the decor is represented by one large element, for example, a bright snowflake made of textured paper. The remaining accessories are much smaller in size; often the entire New Year's decor is limited to a large snowflake in the center of the glass.

Asymmetrical placement
This is how narrow high windows are decorated: paper decorations are placed diagonally, sometimes they are placed in the center, lower or upper part of the window opening. The purpose of such decor is to create the impression of a casual, natural arrangement of elements.

Asymmetry creates the effect of negligence
On the eve of the New Year, I would like to touch upon such a topic as holiday window decorations. Any decorations bring a festive atmosphere to our home, and elegant windows bring a holiday to our streets, to our cities. They attract the attention of passersby and invite the New Year to come into our home.
DIY glass stencils
The most common material for both New Year's crafts and crafts for other holidays is paper. This is such a good and convenient material that for centuries there have been various schools of making paper crafts. Take, for example, the same origami.
But today we are interested in New Year's stencils. The making of such crafts came to us from ancient times from China and, as you can see, it has taken root. Although in Ancient Rus' they were fond of such creativity.
First, about the necessary tools.
To make stencils we will need:
- scissors,
- stationery knife,
- a flat place - a table or board,
- and, of course, paper. (The paper can be colored or even wrapping.)
The simplest thing you can do is traditional snowflakes. It’s not difficult to make them, the main thing is to fold them so that you get an interesting shape. There are two ways to go here. Take a paper square or rectangle and bend it six to seven times.
You can put a piece of paper on the table and draw a large circle either with a compass or using a plate. After that we fold it in the same way.

By the way, the paper folding technique is a classic example from origami.
After we have folded the paper and got a triangle, we take a pencil and draw patterns along the edges of the triangle. Then we carefully cut out the drawn areas with scissors and unfold the snowflake. We will get the following products:

In more detail each:

You can just take these templates,

print or draw it yourself and cut it out

Patterns can be different - it all depends on your imagination. These same snowflakes can not only be hung individually, but also entire compositions can be made from them.

It looks quite interesting and impressive. This is, of course, a fairly simple option that is available to everyone. However, there are more artistic works that not everyone can do. 
Therefore it is better to copy them

download to your computer and print.

If you are an artist, then drawing your own idea will not be difficult for you. What should the rest of us do?
But nothing is impossible, and the Internet comes to the rescue. Find the template you like best, download it and print it. After this, carefully cut it out using a stationery knife for small parts.
The template is ready. All that remains is to stick it on the glass. You can, of course, “stick” it with glue, but then it will be difficult for you to tear off your craft.
To make everything easy to clean after the holiday, we use laundry soap, apply the solution to the product and then stick it on the windows.
How to make stencils for the New Year 2019 (video)
In the description under the video, and also in the next part of the article, you will find templates for downloading, but for now, watch and choose:
and another good video with stencils:
By the way, in the era of plastic windows, hardly anyone remembers that in the not-so-distant times, when window frames were entirely wooden, they were sealed for the winter with rolls of special paper or simply with newspaper strips, using the same soap.

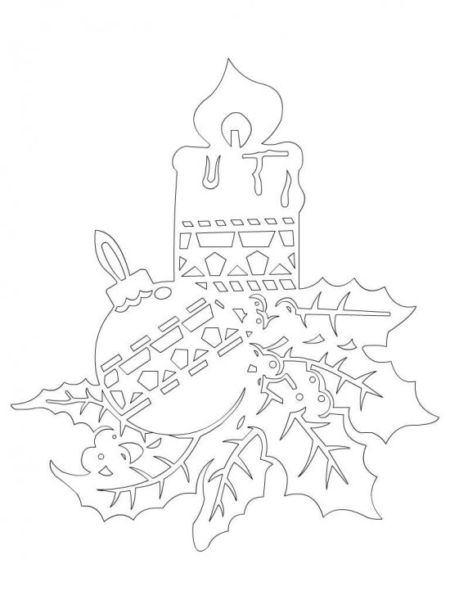
Paper templates in the shape of a pig
The coming New Year 2019 is the year of the pig. All preparations, both in clothing and in the interior and holiday menu, are associated with this symbol. Therefore, it would not be superfluous to decorate our windows with stencils of this wonderful animal.
Below are some great stencils.

You can safely download them:

Print and use for decoration:

Cutting with your child will be both easy and fun!

Use to decorate windows or mirrors.

You can decorate the pillows))

These templates are also suitable for cabinets.

Cut and decorate doors!

If the walls are painted, you can also use it for walls. We do not recommend it for wallpaper.

The first method of applying a design using a stencil: You can not only glue the cut out stencils, but also use them to apply a design on the glass. To do this, cut out a stencil from cardboard so that it does not wrinkle and apply it to the glass. After this, take toothpaste squeezed out on a saucer, diluted in a small amount of water, and foam rubber rolled into a tube. Dipping foam rubber into a toothpaste solution, we stencil the design onto the glass.
If the design is complex and needs to be blotted for a long time, you can glue the template (made of thin paper) to the window with soapy water, and when all the work has dried, remove it from the glass.


Small details can be scratched with a thin stick.

Second method: attach the stencil to the window and use a toothbrush dipped in toothpaste or paint to spray the mixture onto the glass around it. Remove the template, but the drawing will remain on the window.

It will look as if it were covered in snow

Stencils for windows for the New Year - can be printed for cutting
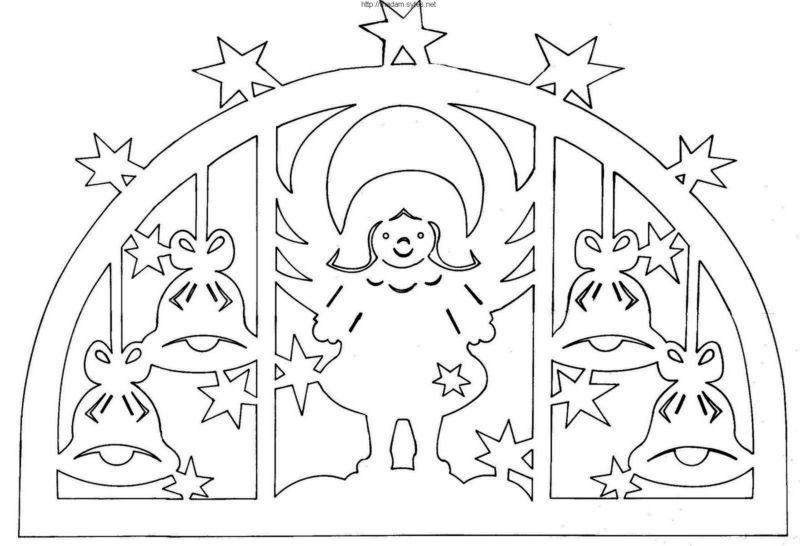
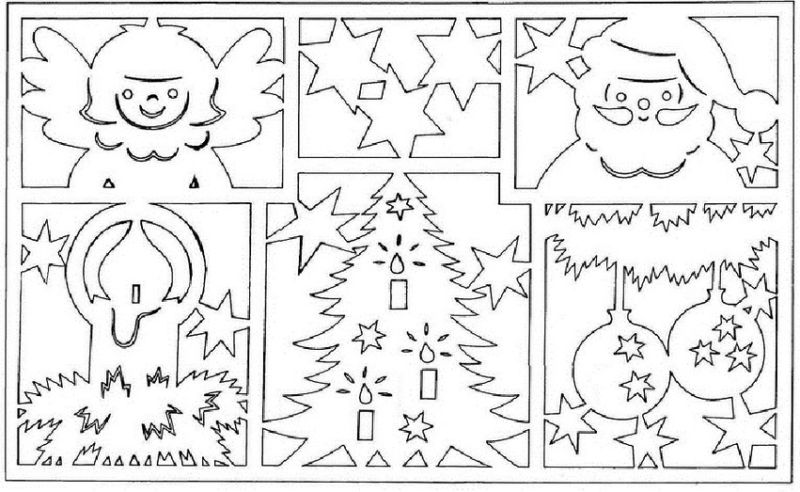
Here are some more stencils you can print out and use to decorate your Christmas windows.
Santa Claus and bells

Decorated Christmas trees

Angels, bells, deer

More options for fir trees

Snowman and Santa Claus on a sleigh

Christmas tree, boots with gifts and happy Santa Claus

Snowman, deer and house

Angel and Santa Claus with gifts

Another version of the Christmas tree and Santa Claus

Window decorations

Bells

Snow Maiden

Father Frost

Holiday house on glass

House option with candles

And such a composition

There are many stencils to suit every taste. So choose, print and use to decorate your home, school, kindergarten or work. I guarantee a festive mood :)
How to decorate glass and cabinets (video)
Unusual and original window decoration ideas
There are so many ideas for window decorations that it is quite difficult to identify them all. Every more or less creative person has his own approach. But often, even in search of inspiration, we look for ready-made original ideas. We may not use them, but they will give us a reason for our own equally interesting finds.

Tree decorated with toys

For example, snowflakes not glued to a window, but hanging like blinds, look quite interesting.

Can be used for decoration and natural material - cones

And here, look, a whole composition of paper crafts

What do you think of this composition? After the holiday you won’t even want to take it apart.

So there are no limits to creativity!
DIY 3-D snowflakes (video)
And finally, a short video on how to make not flat, but voluminous snowflakes. Also interesting and unusual.
Happy New Year and Christmas holidays!
Greetings, friends! Today we again continue the theme of creating a New Year's atmosphere by cutting out handmade items from paper. That is, we will talk about again.
In this post you can find silhouettes of fairy-tale characters, the main characters of Father Frost and the Snow Maiden, snowmen, deer, balls, snowflakes and much more. You will see ready-made window design options, and you will also be able to download and print the proposed stencils and templates. And then carefully cut them out and stick them on the windows, or decorate other corners of your interior.
But remember that window decoration is an integral part of the magical New Year holiday. You can decorate only glass with paper protrusions, or you can create an entire composition using a window sill. Use large clippings to decorate walls in rooms.
If you have very little time to create a festive interior, then cut a lot of carved ones and paste them all over the house.
So, in order to make the windows festive, use plain paper, preferably not only white, but also other colors. Also stock up on sharp thin scissors, or better yet, a sharp stationery knife, and materials for sticking decorations (toothpaste, double-sided tape, soap solution).

After you have prepared all the necessary tools and materials, you will need to choose paper decorations. In our case, these will be flat accessories for gluing to the glass surface, since there are also volumetric elements.

The size, shape and color of the products will depend on the area of the room, the level of illumination and the size of the window itself. The main thing is that the decorations do not interfere with the free passage of light into the room, and the rest depends only on your imagination.

After determining the plot for the New Year's window, start creating stencils. If you know how to draw well, then you can come up with templates yourself, but if you have limited artistic skills and imagination, then take ready-made patterns, print them on paper, and then start cutting them out.
This traditional paper decor will not take much time and will not require special skills, but it will help you create a real pattern and will impress not only you, but also those around you.
An abundance of accessories is only appropriate on a large window, so don’t overdo it! And try to choose openwork decorations.
After cutting out the decorations, decide on their placement on the glass. You can use symmetrical, central or asymmetrical placement.

Well, then choose a method for attaching the decorations and, in fact, glue them. This is how you can decorate a window quickly and easily.
Now I suggest you watch a video about how to correctly cut out accessories for decoration.
Well, samples of New Year's window design.


Window decorations for the New Year 2019 (templates inside)
Well, let's get down to choosing and creating flat paper toys. To begin with, the most popular characters are Father Frost and Snow Maiden.


Of course, don’t forget about funny snowmen.


You may also need an image.


And don’t leave your loved ones aside.


Even from these elements you can already create a fairy tale on the window.
Jewelry stencils for cutting out in A4 format: can be downloaded and printed
I want to say that many flat accessories can be cut not only according to a template, but also according to a symmetrical pattern. This, for example, applies to Christmas tree decorations.
Another great idea would be backlit cutouts. Just glue translucent paper, such as tracing paper, to the inside and carefully pull a small garland (one of the lights) through it. It will look something like this:

So keep a bunch of different stencils with balls, bells, cones, numbers, animals, etc.


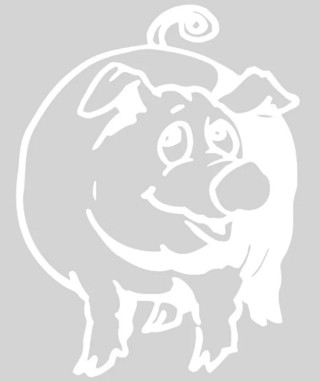
Don't forget about the symbol of the upcoming New Year 2019 - mischievous pigs.


DIY window decorations for the New Year in kindergarten and school
And I would like to make a separate thematic selection of paper decorations for educational institutions. After all, our children rejoice most of all at the coming of the holiday. So schools and kindergartens should not only organize matinees, but also magically decorate the premises.


Good luck to everyone!
I think that you’ve already been waiting for me, I promised and I still can’t publish this post. And now it has finally happened. I am happy to offer you everything that I found on the Internet. Still, how many beautiful and cool decorations people have come up with to decorate their home, apartment or any room on New Year's Eve. All you need to do is take ready-made stencils, attach them to a sheet of paper, cut them out and you will get a new masterpiece. Which is easy to place on the window and that’s it, enjoy your health. All the templates are simple, but at the same time they are amazing!
So today, friends, I suggest you plunge into the world of vytynanok or kirigami. By the way, do you know what this is? Yes, that’s absolutely right, this is a special technique that first appeared, as sources indicate, in China. So, keep yourself busy with something interesting and creative, such work will only bring joy.
In addition, you can create crafts in the form of or, because all these symbols are required on New Year’s Eve. Do you agree?
Even if you are not yet sure that you will succeed, I am sure that after looking at this note you will clearly want to work hard, it will, as they say, excite you, touch you to the quick and awaken the master in you). Before you know it, you will become wizards. Ah-ha, like Santa Claus, paint all the windows with such a beautiful paper decor.
Well, well, please get straight to the point. Choose plots, compositions or individual characters, whatever you want. And don’t forget about the main symbol of this year - the yellow pig. By the way, you can make it, or make it from improvised means.
Before moving on to the process of creating crafts, you need to understand the main thing. All the pictures that you see here must first be downloaded to your computer. How do you do it? And like this, right-click and select Save Image As.

And then you paste them into a Word text document and stretch them by the corner to the size you need.

Then take a cutter and start creating, carefully cut out the motif or composition you need along the line. Move from the largest details to the smallest.
Remember, to do this type of work, you need to do it not on the table surface itself, but put something flat, but not necessary, for example, a board.

First of all, I will show you snowflake stencils, because they are in great demand. You trim the black background, turn the piece over and glue it to the window.
There is such variety here, and inside there are treasured animals or New Year's heroes and decor. In general, such window decorations look amazing. Look, even from them the author figured out a Christmas tree.

So, here are the long-awaited templates. And by the way, you can use them in different ways, the first option is to cut and glue, and the second, attach the sheet to the window and, where you cut it, apply toothpaste by spraying a drop. Oh, you’ll find out more about this a little later. Catch).


You can take the most delicate or carved fluffs, they are of course more difficult to cut.


How did you get the job done? Then quickly take any of the proposed materials and glue the stencils to the stele. There are many ways to do this and why, choose:
- double-sided tape or tape;
- milk;
- toothpaste;
- soap solution;
- water;
- liquid paste;
- PVA glue or stationery glue.

Frosty patterns to print and cut out
We continue to create a New Year's atmosphere and let's decorate the windows with something snowy, such as icicles. Or we’ll draw some patterned motif, like Grandfather Frost does. Choose a design and print.

Here is a pattern in an angular style. 


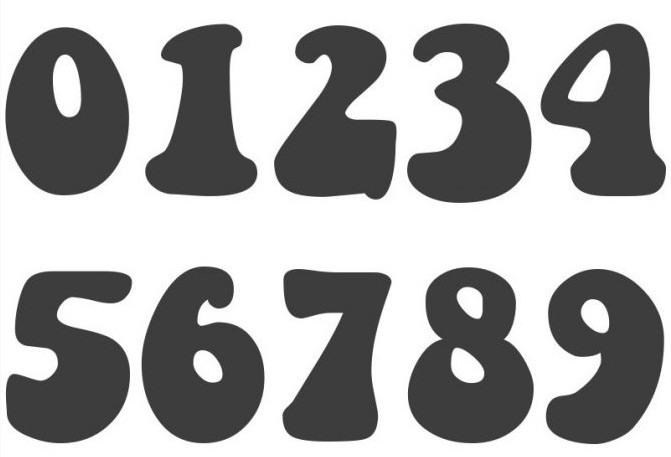
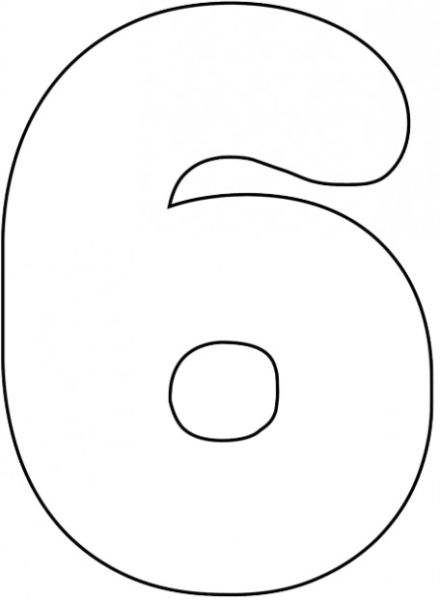
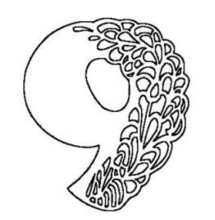
Cut out numbers and letters for New Year's Eve
I think that numbers or figures will definitely be useful to you, because every time you can’t live without them, so take them into your piggy bank, especially when there are plenty of options and plenty to choose from.
I tried to find all sorts of designs and sizes. To make it more convenient for you to choose. Decorate halls and groups, use in schools and gardens, cafes, etc. I even found multi-colored ones, and huge ones, but which ones do you need, maybe small ones? Isn't it really lovely?


We’ve sorted out the numbers, now take templates of the letters of the cherished words: “Happy New Year.”


Or use this version of the most necessary words on January 31, which are made in the form of a garland.


DIY paper window templates
I want to show you a video on this topic. Yes, you yourself can already guess what it will be about. After all, the window is easy to design if you just want it. You can install or make any one, like the ones I showed in, you can install and use. And by the way, don't forget about . There are a lot of options, create for your health!
Here's another cool idea in the form of a deer. If you need this particular template, let me know and I will send it. I think it will be fun when you walk and such a friend smiles at you from the window).
Among other things, you can paint a window with toothpaste using the same stencils, if you don’t know how to do this, take a look. On my own behalf, I would like to add that it is better to wet the toothpaste, or rather, wet the white solution onto a toothbrush and swipe the bristles at yourself with any stick. That is, you will get splashes in the form of droplets.

In addition, you can use white gouache, choose what is more convenient for you.
Now the plot itself, if you still don’t understand anything. Let's go have a look.
Do you remember when we created a house or hut for a snow composition with you, it also turned out so cool. Many people thanked me for the diagram, it is not mine, but taken from the Internet, but I am sharing it completely free of charge. This is what happened, cool!

How to decorate windows for the New Year: beautiful templates and diagrams in A4 format
Well, friends, there are a variety of options that I managed to get for you. Let it be Father Frost and the Snow Maiden with a Christmas tree, also a cheerful and mischievous snowman and a bunch of other characters. Many people print them out and decorate them with angels or depict winter fun. You can often find stories from children in such themes. In general, create a fairy tale, I wish you good luck!
All these sketches will easily fit on a landscape sheet or A4, if you don’t know how to do this, then read above, I showed how.


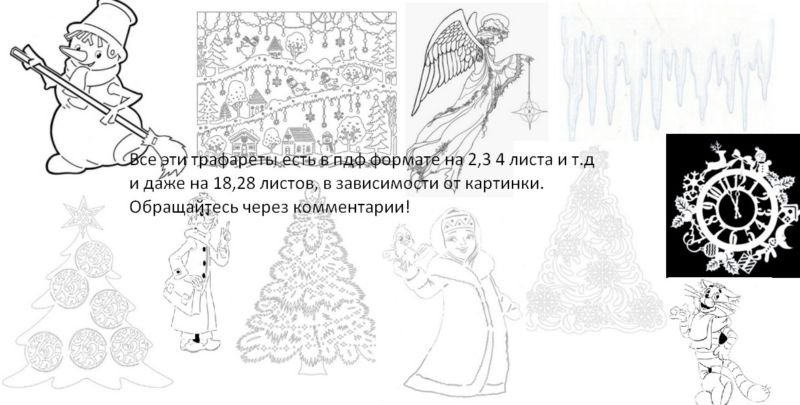
Friends, today I got hold of templates for Frozen and Olaf. Available in large sizes on 2, 12, 18, 28 sheets. Write if anyone needs it. There is also Pechkin (2 and 3 sheets), Matroskin (2 sheets), Sharik (2 sheets).


And also, here are these large stencils for three-hung windows that I found on social media. VKontakte network.


Vytynanka Pig - symbol of the New Year 2019
But who can’t we do without this year? Of course, without the funny and playful pig, or as the kids like to say - pigs. This is the most important guest who will come to visit you on January 31st. Meet me.


Honestly, I have a document in which there are a bunch of piglets and all that kind of stuff, and with numbers and piggie faces. I will send it to anyone who needs it. Here I didn’t show everything, of course, but only a small part; you can’t display everything in a note, there are too many of them.


New Year's paper stencils for cutting out windows
Well, in conclusion, I would like to please you with more new products and ideas of what you can put on your glass. What an amazing view it will be from the outside, all the neighbors will be jealous. In general, I definitely recommend it.
The main thing is to come up with a plot, for example, it could be any fairy tale, or how children play snowballs in the yard. Take any favorite cartoon and get weird. By the way, there are a lot of ideas on this topic, where people show and share their work in a VKontakte group. I will send a link to anyone who needs it.
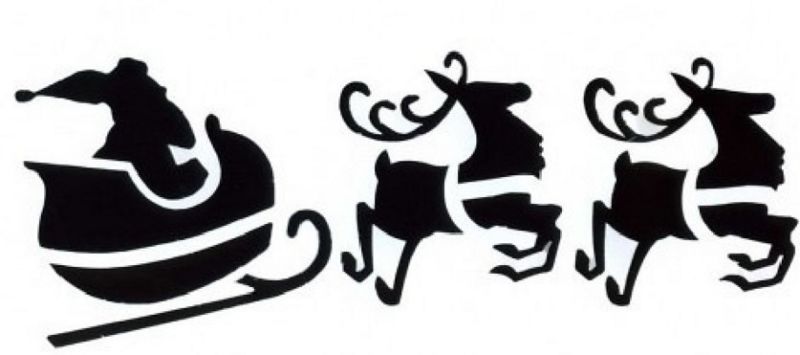
Create reindeer. Don’t forget to glue or draw the main character on the window - I mean Grandfather Frost and his sleigh carriage.


The Snow Maiden may be located nearby.


Also, the Snowman is necessary for winter compositions.


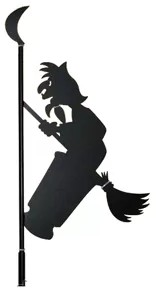
You can also carve the forest beauty Baba Yaga).


A spruce branch or Christmas tree would also look cool.


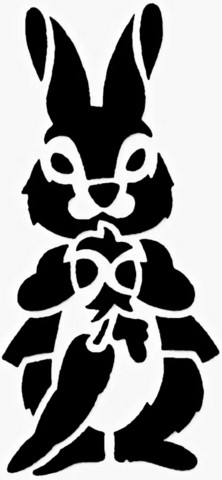
Funny bunnies in a clearing also certainly look beautiful.


Vytynanka New Year's balls and toys (pictures)
And here are a couple more ideas, because bells always remain in fashion, they are the ones we use to transform everything on holidays. Let them be everywhere, and with them the balls. I suggest you look at this collection. Take note too, friends.


From everything you see, you will decorate your apartment amazingly cool and attractive. Create masterpieces, especially since it’s not at all difficult to do when you have everything for the job at hand.

Happy holidays, gentlemen! See you soon, good luck and Siberian health! Bye.
New Year is a holiday that gives us a truly unforgettable atmosphere. It's no wonder that children and adults look forward to this fantastic celebration! And without what is the New Year completely impossible? Of course, without holiday decor! The anticipation of the holiday appears only when Christmas melodies begin to sound in the streets, the smell of tangerines fills the air, shop windows bloom with themed decorations, and thousands of lights are lit on trees and roofs.
Before the onset of the most magical night of the year follows. In every house or apartment, they take out boxes from the mezzanine, hang them, place them on shelves and installations, and a day or two before the holiday, they solemnly install a beautiful Christmas tree. However, one place that can also be decorated for the New Year often remains completely unclaimed.
Cardboard and colored paper will allow you to create an unforgettable New Year's decor!
We are, of course, talking about windows! There are many simple but amazing ideas for decorating glass and window sills that can give a magical mood to both the residents themselves and random passers-by. Beautifully decorated windows will not go unnoticed by guests and relatives who come to your holiday. In addition, such decor will give you the most pleasant sensations and increase your mood during the winter holidays.
Naturally, in store windows you will find a huge amount of New Year's paraphernalia, but lately it has been fashionable to decorate the house with items that the owners made with their own hands. And so that you don’t rack your brains when choosing New Year’s decor, we have selected the most original ideas and master classes on using stickers, creating window paintings, making protrusions and garlands from the simplest materials!
Idea #1: Decorating windows with toothpaste
 Toothpaste can be used to decorate not only windows, but also mirrors in the house.
 The older generation remembers very well that during periods of Soviet shortages, toothpaste was the main tool for creating New Year's decor. It was used to paint not only apartment windows, but also the windows of schools or kindergartens, involving children in this fascinating process. It is worth noting that toothpaste is a universal artistic material that allows you to create several types of painting at once - both ornamental and negative.
In the second type of painting, the design is similar to the image of a photographic film, that is, it is the dark, unpainted places that become the accent. By the way, this is the simplest type of painting that even a child can easily handle. Be sure to involve the kids in the process of creating fabulous pictures on the windows! Another positive point is that after the celebrations are over, you can easily clean the windows from the pattern by simply wiping the glass with a wet cloth. Before you get started, you need to prepare:
- foam sponge or old toothbrush;
- a piece of adhesive tape;
- a bowl;
- water;
- scissors;
- a cloth;
- pencil;
- paper.
Procedure
 Step-by-step instructions for decorating a window with toothpaste
 - 1. Download several of your favorite New Year’s themes from the Internet. These could be Christmas bells, snowflakes, reindeer, penguins, Christmas trees or Santa Clauses. Print the designs on paper and cut out using scissors. It is better to first prepare stencils with small details by shading with a pencil the places that need to be cut out, so as not to make mistakes in the process.
- 2. Wet the template with water, immersing it in a bowl for just a couple of minutes. You can also place the template on a flat surface and walk over it with a wet sponge.
- 3. Stick the template to the selected location on the window glass.
- 4. Gently blot the paper with dry flannel.
- 5. Squeeze toothpaste into a bowl and dilute with water until it becomes liquid sour cream.
- 6. Take a toothbrush, dip it in the paste, shake it off a little and, running your finger along the bristles, spray the mixture onto the window where the stencil is glued. When the paste evenly covers the window, peel off the paper. The drawing is ready! You can also use a piece of foam sponge for this purpose - soak it in the paste, shake off excess moisture, and then lightly press it onto the glass around the stencil.
If you have at least minimal artistic skills, you can paint the window by hand, but for this purpose you will first have to make yourself a brush. To do this, twist the foam rubber into a tube and wrap it with a piece of tape. It’s better to make a couple of brushes with different diameters to paint both large and small details. Squeeze the paste onto a plate, dip the brush and draw fir branches, snowmen, Christmas tree balls and streamers.
When the paste has dried, take an orange manicure stick or toothpick and scratch small details - dots or stars on balls, eyes on snowmen or needles on spruce paws. Using the same principle, you can create window paintings painted with gouache paints or artificial snow from a spray can.
Idea No. 2: Snowflake stickers
 Children will like handmade snowflakes much more than store-bought ones!
 A snowy winter with soft fluffy snowdrifts is the dream of most children and adults. After all, it’s so nice to go sledding, build a snowman, have a snow fight, or go for a walk in the forest! Unfortunately, not every New Year brings us snow, and slush spoils the entire holiday experience. However, you can create a snow whirlwind at home. To do this, you need to decorate the windows with unusual stickers made from PVA glue.
Who would have thought that extraordinary decor could be created from such a simple material? During the day, while it is light outside, the snowflakes seem almost transparent and do not interfere with the view. But in the evening, when the moonlight or rays of lanterns fall on the window, it sparkles like real frost! By the way, this decoration can last for more than one year - just carefully remove the snowflakes, line them with paper, put them in a box and send them to a dry place until the next New Year. To make snowflakes you need to have:
- paper or ready-made cardboard or plastic stencils;
- strong film or paper files;
- a jar of PVA glue;
- medical syringe (no needle required);
- brush;
- glitter (you can use those used for manicure).
Procedure
 Step-by-step instructions for creating and decorating snowflakes
 - 1. Place the stencil inside a plastic file or place it between layers of film. If you don't have a ready-made stencil, choose one to suit your taste, print them on paper and place them in a file.
- 2. Trace the stencil lines with adhesive mass, squeezing it out of a medical syringe in a thick layer. Correct the drawing with a brush. Important: do not get carried away with making openwork snowflakes! Small details will most likely just blend into the overall mass, so choose patterns with simple lines and large curls.
- 3. Carefully move the stencil to a windowsill or other place located near heating appliances. Let the drawings dry a little. When the glue becomes transparent, but not completely dry, remove the frozen snowflakes from the film and glue it to the window.
- 4. To make shiny multi-colored snowflakes, repeat all the manufacturing steps, only sprinkle the workpiece with multi-colored sparkles before sending it to dry.
Idea No. 3: Vytynanka for windows
 An example of a window decorated with Christmas decorations
 Idea No. 9: Compositions from pine needles
 can be made from many natural materials!
 Traditional decor cannot do without compositions of fragrant pine needles, which fill the house with an incredible aroma. The easiest option is to make small wreaths and hang them on the windows using bright satin ribbons. To make this decoration you need to prepare:
- spruce branches (you can supplement them with thuja or juniper branches);
- heat gun;
- wire (thick and thin);
- viburnum branches;
- New Year's balls;
- beads
Procedure
 An example of minimalist window design using pine needles
 - 1. Take two pieces of thick wire and bend them so that you get rings of different diameters (the difference should be about 3-4 centimeters).
- 2. Wind the rings diagonally with thin wire to make the frame of the future wreath. Make a fastener from a long piece of tape.
- 3. Separate the branches into bunches and attach them to the wreath, overlapping each other.
- 4. Add small cones, balls, beads, rose hips or viburnum, attaching the decor with a heat gun.
- 5. Cut a piece of ribbon and tie a fluffy bow, attach it to the top of the wreath.
By the way, spruce wreaths can not only be hung on the cornice, but also simply placed on the windowsill, and a thick candle should be placed inside such a decoration.
Idea No. 10: Garlands made of cotton wool
 Step-by-step instructions for making a garland from pieces of cotton wool
 Decor for window openings can be made from the simplest items that are found in every home. For example, from cotton wool. To make a garland, you need to prepare a large number of cotton balls, roll them to make them denser and string them on a long fishing line, hanging them in the window openings. Alternate lumps of snow with snowflakes made from napkins - this way your craft will become airy, and the illusion of falling snow flakes will appear in your apartment.
Idea No. 11: Garlands made from cups
 Master class on creating a decorative luminous garland
 You can also make an unusual decor from paper cups by making transverse cuts (crosswise) in the bottom with a stationery knife. Then insert the light bulbs into the holes and attach the garland to get original shades. If you don't have suitable paper cups, you can do the same manipulation with plastic cups. In this case, you will need to decorate them - these can be strips of colored paper or ordinary napkins with a pattern placed on glue.
Idea No. 12: Panorama with a winter forest and animals
 Multidimensional paper panorama for Christmas and New Year
 We have already told you how you can create a fairy-tale village or a city sparkling with lights on your windowsill, but the panoramic crafts don’t end there. On the window you can arrange a magical panorama clearing with Christmas trees and animals. To work you will need:
- paper;
- scissors;
- pencil;
- garland of LED light bulbs.
Procedure
 Making a paper installation with an LED garland:
 - 1. Glue together several sheets of office paper so that their total length is equal to the length of the window sill. Make 2-3 such blanks so that the panorama has several layers.
- 2. Find and download drawings on a New Year's theme - Christmas trees, bunnies, bears, penguins, snowmen or deer are perfect for this purpose.
- 3. Cut out the stencils and transfer them to a paper strip, placing the drawings continuously one after another. Before drawing, step back 5-6 centimeters from the bottom edge and bend the sheet so that you can then place the panorama on the windowsill.
- 4. Arrange the panoramas on the window so that the taller figures (for example, trees) are located near the window, and the lower ones stand on the edge of the window sill.
- 5. Lay an LED strip or a garland with light bulbs between the layers and light it to get a real fairy tale on the window.

