28.10.2020
New Year's mask papier mache painting. How to make a papier mache mask. Making a cute papier-mache mask with your own hands
A costume for a carnival or New Year's party can be bought in a store, but it is much more interesting to make it yourself. And if everything is simple with sewing an outfit, then making a mask may seem like a daunting task to a novice hand-maker. But in order to acquire an original accessory, it is enough to make a papier-mâché mask. A simple step-by-step master class will help with this.
The mask can come in handy not only for celebrations, but also at any events where you need to maintain anonymity. For example, at various rallies. The papier-mâché technique creates a lightweight yet durable accessorythat will not let you down even at the most violent events.
Papier-mâché is a method of making crafts using wet paper as a material. The paper pulp is fastened with ordinary PVA glue. The method was invented in France in the 16th century. Then dolls were made from light and durable raw materials. Later, the same technology was used to create DIY Venetian masks. A sculpting master class involves the use of one of three techniques:
- Formation of crafts from wet paper pulp. The mask is prepared using a special technology.
- Pasting the model's face to give the product an anatomical shape.
- Making a mold from plasticine and then pasting it.
 As a mass for modeling, you can use a special sculptural plasticine. It is much easier to work with it than with ordinary children's material. Any paper will do for work. It is advisable to use thin newspaper sheets or low quality plain paper for the printer.
Since the finished product takes some time to dry, you should create a craft in advance. It is better to start work three days before the appointed matinee, because there should be enough time to decorate the costume.
Individual mask for the child
The most interesting way to make a papier-mâché mask is sculpting from a live model. To make such a craft, you will need a volunteer, whose face will become the shape for future workpieces. In addition, you should prepare:
- pVA glue;
- gauze;
- water and a container for it;
- newspapers;
- napkins.

Forming a paper blank
 A child who has agreed to become a model is laid horizontally and hair is collected from the forehead and ears. For convenience, you can pin the strands with hairpins. The face is abundantly lubricated with a fat cream and cling film is applied to it. This will remove the craft and leave your skin clean. Holes for nostrils and eyes must be made in the film.
The first three layers of the mask are made of napkins. The pieces soaked in water are applied to the face, bypassing the eye and nostril areas. You should divide the napkins into parts with your hands, tearing each into several pieces. Cutting the paper with scissors is not worth it, since the finished craft from such material will be bumpy.
While the napkins on the face dry up, the torn pieces of newspaper are soaked in the glue mixture. To make the craft dry faster, PVA is mixed with water in equal proportions.
Pieces of newspaper soaked in the glue mixture are glued to a layer of napkins. Perform the procedure until the entire required area is covered with paper. When there are three layers of newspaper on the face on top of the napkins, pause and dry the structure with a hairdryer.
If necessary, thickenings are made in some places in stages. For example, you can put more layers of paper on the bridge of your nose. The looks of some heroes need face shaping. For example, a Shrek mask can be "equipped" with chubby cheeks.
When three layers of newspaper are applied and dried, the mask is left to dry for a while. To keep the model from getting bored, you can entertain her with cartoons.
When the paper pulp grasps a little, mark the places for the eye slits with a pencil. The mask is carefully removed and the film is removed from it. While the material is not frozen, it should be handled carefully so as not to spoil the shape of the craft.
While the mask is wet, its edges are leveled, cutting off excess parts with scissors. At the same stage, holes for the eyes are cut out with a clerical knife, as well as holes for the braid. You can also make miniature breathing slots, in order to save the future Shrek from discomfort.
Completion of modeling and decor
 When all the holes in the craft are ready, the mask is wrapped with gauze soaked in PVA. Particular attention is paid to the ends, hiding the angularity of the product.
The craft is left in the fresh air until it dries completely. Then it can be putty and sanded with fine-grain sandpaper. The mask can now be decorated.
To begin with, it is covered with paint and left to dry. By using aerosol cans, you can reduce your operating time by several hours. The painted over mask is decorated in any way you like. For example, you can paste over it with stones or paint it with acrylic.
Beasts and fairytale heroes
 It is convenient to use the face as a form only when the mask has outlines similar to the human shape. If the child gets the role of a fox or a wolf, it will be more difficult to make a mask with his own hands according to the proposed scheme.
To make a mask of an unusual shape, you can use plasticine or sculptural mass. The material is kneaded and covered with a rounded object. You can use a wooden block or the wall of a small bucket as a base.
Gradually applying layers of plasticine, the desired outlines of the face are formed on the bar. Irregularities are smoothed out with fingers, and grooves are made smooth. When the form is ready, it is placed in the refrigerator for several hours. The frozen blank can be used to create a mask.
You can make the look of any hero with your own hands from papier-mâché. It is enough to paste over the plasticine mold with a newspaper soaked in PVA. The algorithm of actions remains the same. However, you should not dry the craft with hot air. Under the influence of heat, the plasticine will soften and lose its shape.

If you need to make a large mask, the clay can be replaced with another material. Ordinary foil will do the job perfectly. It is much easier to form a blank out of it, and it is not at all necessary to freeze the form. To easily separate the paper layer from the base, before applying the paper, the foil is lubricated with vegetable oil.
Complex volumetric shapes
If for New Year's chanterelles and hares, the usual puff paper method is perfect, then with volume masks the situation is more complicated. Other methods can be used to create angular shapes and protruding parts of the face.
For example, to make the protruding cheekbones of a terrible monster, you will have to put dozens of layers of paper on the blank. This time-consuming and energy-consuming process can be simplified. All the same newspapers and PVA glue are useful for this. To create volumetric forms, the so-called paper pulp is prepared. Preparation of paper pulp:

 The resulting liquid can be used to create masks of any complexity. A form made of foil or a durable balloon is used as a base. The number of layers of paper pulp can be any. It all depends on the thickness of the solution and the time it dries.
You can fix the shape of the craft with gauze. The fabric is applied in one layer on both sides of the garment. After drying, the mask can be painted with acrylics, gouache, watercolors or spray paints.
If a balloon is used as a base, then the holes for the eyes and fasteners are cut after it has completely dried. To do this, use a sharp clerical knife.
A do-it-yourself popiemoche mask is an easy way to make an original highlight for any costume from improvised means. The method allows you to build both a hockey and a carnival mask.
Cook the paste. It is a sticky, viscous substance made from starch or flour that perfectly replaces strong glue. Pour 2-3 tbsp into a bowl. tablespoons of starch (flour) and cover it with water (half a glass). Stir the mixture and pour another glass of boiling water into it. Pour into a fireproof dish and boil the glue for about five minutes. It is better to use the paste immediately.
It is good if there is a plastic base for the mask. If it was not found, then you need to sculpt a dummy from plasticine. Sculpt the base in the form of a mask - the whole face or half of the face. Make a hole in the eye sockets. To make the resulting paper mask easy to remove from the plasticine blank, it must be greased with Vaseline. After you have sculpted the base, tear the newspapers into pieces.
Use newspaper sheets in two different colors - black and white and colored. You can use a snow-white napkin instead of colored sheets. The pieces should not be too small, so as not to complicate the work, but also not large. Cut the cotton fabric as well. It will give density to the paper mask. Place the pieces of paper and cloth in separate bowls.
How to make a newspaper mask correctly? Take the base and apply the pieces one by one, moistening them in water. For the first layer, you do not need to use paste, so that the newspaper mask does not stick to the plasticine base. Wait for the first wet layer to dry. Continue glueing the scraps, alternating the two colors to avoid confusing the newspaper layers.
The fabric should be glued in about two layers. Tear a thin napkin in large pieces, it will smooth out irregularities, cracks. Make 6-7 layers in total. Leave to dry overnight. After the mask is completely dry, rub it with a piece of velvet cloth. Process the holes for the eyes (it should not be sealed), trim the paper around the edges of the mask with scissors.
The newspaper mask is almost ready. Now cover the resulting product with acrylic paint or glue it on top of velvet or lace fabric. If you want to stick the fabric on top, then you must first cover the paper mask with acrylic varnish. For better adhesion, steam the garment immediately after applying the fabric. Matter-free acrylic paint dries quickly and leaves a beautiful shine.
You can decorate the finished souvenir with anything you like. Glue around the edges of the mask with vintage lace tape that matches the color of the paint. Rhinestones can be attached to the edges of the eye holes. Decorate the mask with beads, beads. Also attach a string to the back of the mask, for which you will hang it or put it on your face. This product will be a wonderful item for interior decoration.
The best material for making carnival masks is papier-mâché, a paper pulp made in a special way that is easily soaked in water, but does not turn into mush, so it is best to use ordinary newsprint. So, on the eve of the New Year, we will learn how to make a papier mâché mask in order to create a bright and non-standard carnival outfit for ourselves (or a child) for the holiday.
So, for work we need:
- old newspapers;
- thick paper (non-solid cardboard soaked in water, writing paper, old magazine sheets or kraft paper);
- a skein of bandage or a piece of old cotton cloth;
- sharp office scissors;
- wide brushes and paste (you can use PVA glue);
- clay, special plasticine (materials that freeze easily in air);
- finishing materials (thin fabric, lace, velvet, feathers, rhinestones, sequins, laces):
- varnish, acrylic paints, etc.
Let's start preparing!
Before starting work, you need to slightly dilute the PVA glue with water, and if you did not have time to buy it, then prepare a regular paste. To do this, you need to stir 2-4 tbsp. (without a slide) starch in a liter of water and, stirring constantly, cook this mixture over low heat until thickened. A small cup of paste will be enough for one mask.
Making a blank for the mask
The second stage is making a model, on the basis of which we will make a mask. To do this, you need to decide in what way you want to charm guests at the holiday and take as a basis a ready-made plastic or cardboard mask that will suit you in size and shape. Then we make exactly the same mask from clay or sculpted plasticine.
If you have certain skills in working with plaster or clay, and you are good at drawing or have an understanding of anatomy, you can try taking an impression of your face yourself. The main rule is to accurately observe all the proportions so that the papier-mâché mask fits well on it. It is very important to use high quality natural materials so as not to cause an allergic reaction on the skin.

Creating the mask itself
When the mold is ready, let it dry completely, then cover it with a layer of Vaseline and start pasting it with papier-mâché-style paper.
To start, tear two types of paper (for example, colored and newspaper, newspaper and writing, cardboard and magazine) into small pieces. You need to tear it in layers - the first of thick paper, so that the mask acquired the necessary hardness. This layer does not need to be glued, but simply lay on a form smeared with petroleum jelly. The second layer (newsprint) is already placed on the glue base, while each glued piece should be well smoothed so that no air bubbles appear under it, otherwise the mask will look loose.
The third layer is thick paper, for gluing which you need to use a thicker paste and work especially carefully so that each piece can adhere well to the previous layer. The fourth layer is newsprint (plain colored or writing) paper.
The next stage is pasting the mask with a bandage or cloth. To do this, cut the rag material into small pieces and soak them well in the glue solution. This work must be done very carefully and carefully, because wrinkles may occur. Use some hard object to level the fabric, and cut the pieces that stand out "from the overall picture" with scissors. And again glue a couple of paper layers - from newspapers and cardboard. In order to highlight the embossed areas, glue more paper on them. And finally, the very last layer, for which you need to take a pre-soaked thick white paper or clean white cotton cloth.
The latest improvements
To smooth out any irregularities, wipe the paper joints with a damp cloth (when the glue adheres well to all the paper layers). A little advice from artists on how to make a papier mâché mask more reliable - coat it with a gelatinous solution.
Then dry the finished mask for 3-4 days under normal conditions, during this period do not remove it from the mold so that it does not accidentally deform.
Now we proceed to the most interesting stage - the finished mask. You can paint it with paints (in a spray can, acrylic, a mixture of gouache and PVA glue, oil, diluted on a drier) or cover it with a fabric base (velvet, satin, lace). Spray it well with regular hairspray to set the coat.
If you decide to cover the mask with fabric, then first carefully cut the fabric to the shape of your mask, not forgetting about the allowances, make cuts for the mouth and eyes. Then cover the fabric with super glue and gently lay it out on the mask so that there are no wrinkles. When the fabric is glued, the allowances are wrapped on the back side and also glued. From the inside, you need to glue to the mask and attach elastic bands or cute ribbons with a stapler or glue.

In order for the mask to become a real work of art, it can be decorated with applique, lace elements, beads, sequins, rhinestones, beads, etc., in general, you can not limit your imagination.
How to make a papier mache mask? Conjuring over paper! was last modified: January 22nd, 2014 by admin
Making a papier-mâché mask can seem like a tricky business. Indeed, the main difficulty lies in making a frame for applying paper pulp or newspaper pieces. Often it is not possible to do this the first time. However, these difficulties can be avoided. Use the little tricks from this article, and you will get a wonderful mask with your own hands, you can find videos of various creation processes at the end of the article.
Option 1: A ready-made papier-mâché mask
This method works well for beginners. The master class involves the use of such materials:
- base mask made of plastic;
- paper napkins or white toilet paper;
- water;
- pVA glue;
- fatty cream or petroleum jelly;
- hot glue;
- satin ribbon;
- braid and feathers for decoration;
- acrylic paints.
1. Finely tear the paper. We dilute the glue in half with water, soak the paper in this mixture, let it sour.

2. Lubricate the plastic base with cream or petroleum jelly, cover with a paper-glue mixture. We are waiting for it to dry completely.


3. After that, carefully remove the workpiece from the base. With a pencil we outline the outlines of the eyes, the desired shape of the mask in the future. Cut along the lines. We will have a Venetian cat mask.


4. Cover the mask with white acrylic paint and decorate with golden braid.


5. With a hole punch we make holes for attaching strings, glue feathers, draw details.


The mask is ready! A bright DIY papier-mâché mask made according to this lesson will be a wonderful gift or addition to a carnival image.

Option 2: papier-mâché mask from scratch
In the second manufacturing option, we do not have a ready-made plastic mask that we can paste over, so we will have to make the base ourselves.
1. For this we sculpt a generalized face from clay or plasticine. We put it on a larger board, smear it with petroleum jelly and coat it with creamy alabaster. We make sure that the layer is at least 2 cm. We wait for a day to dry, then we separate the form. It should look something like the photo.

2. For work now we need: gauze, paper and paste.

3. We take a piece of gauze so that it is larger than the shape and the edges hang freely.

4. Wet the gauze to make it fit better.

5. We begin to glue the pieces of paper from the deepest place. First, they should be small, then the size can be increased. We also glue the side so that the mask does not warp during drying.


6. Leave the blinded mask to dry overnight. In the morning, pull the gauze in different directions, but not up. The workpiece itself will jump out of the mold.


7. Turn the mask over, leave it to dry for another day.


9. We outline and cut out the eyes.


10. Cover the mask with primer. It is convenient to use construction filler. To avoid cracks, the layer should not exceed 3 mm. Leave the primed mask to dry.


11. Sand again.
Before the festive events, it's time to think about the right outfit. And if this is a children's New Year's party, a carnival party or even a masquerade ball, then perhaps the most important accessory of the invented image should be a face mask. To date, you can find many bright and colorful masks on sale and choose the one that suits the chosen outfit. But papier-mâché masks created with your own hands from available materials will look much more harmonious and interesting.
“Papier-mâché” is translated into our language as “torn paper”, which fully reflects the essence of this material. Papier-mâché is nothing more than paper pulp with the addition of PVA glue or paste to hold paper together. It is best to use old newspapers for making the mass with your own hands, the paper of which is most suitable for papier-mâché, but in the absence of the proposed material, they can be replaced with toilet paper, paper napkins or towels.
Before you start creating a face mask with your own hands, it is important to worry about choosing a base for it.

For this, a number of methods for the manufacture of various bases can be proposed.:
- An old face mask. A simple mask can be used as a basis without any unnecessary irregularities. Just remember that before covering it with papier-mâché, it is worth wrapping the surface of the old mask with cling film to avoid the material sticking to the base.
- Inflated balloon. The most suitable base for beginners. Thanks to the smooth rubber surface, it will be easy to make the mask, since the papier-mâché will not stick to the base and after the material hardens, the balloon can be easily removed.
How to make a papier-mâché Venetian mask (video)
Papier-mâché face mask
The problem with many purchased carnival masks is that they do not fit tightly to the person's face, which in turn leads to its constant slippage. But during the holiday, you want to have a good time, and not constantly correct the annoying accessory. Therefore, an accessory made with your own hands based on a cast of your face will be an excellent solution, because the mask will not only look original, but also the canvas will sit, which means it will bring less inconvenience.
To make a face cast yourself, you can use sculptural plasticine.

A sufficient amount of material must be thoroughly kneaded in your hands and shaped into a pancake with a layer thickness of about two centimeters. After that, the resulting pancake is applied to the face (before this procedure, it is recommended to lubricate the skin with a cream with an oily texture) and carefully shape the shape of the face into the plasticine.
They remove the plasticine form from the face very carefully so as not to damage the result of the procedure performed, and place it on the work surface. After that, the base for the mask, made by hand, is ready.
But this method has one undoubted drawback - not every person can have sculptural plasticine at hand. Therefore, the basis for manufacturing can be made from a more affordable material - food foil. The foil must be folded several times so that the resulting sheet is hard enough, but at the same time easily takes the required shape. After that, apply the resulting piece of foil to the face and, using finger pressure, give the foil the shape of the face.

The almost finished base must be removed if there are any irregularities and cuts in the foil for the eyes and nose. The resulting shape can be corrected by adding plasticine to it in the right places. After that, the base is wrapped with cling film and it is ready for papier-mâché application.
Papier-mâché masks: instructions for making
In the course of a small master class, you will learn how to make a mask on your own and about several options for its design.
In order to make the desired mask, you need to collect some materials and tools that will be needed during the creation of the accessory, namely:
- The basis for the mask.
- Paper (newsprint, toilet, or paper napkins).
- Water.
- Glue (PVA is preferable).
- Brush.
- Paints, ribbons, feathers, beads or other decoration material.
To make the necessary accessory from papier-mâché, you need to follow the general instructions step by step, which will help you carry out the whole process from kneading the paper pulp to decorating the finished mask.
Instructions:
- Tear the paper into small pieces and soak them in a solution of water and glue. In this case, glue and water are taken in a one-to-one ratio.
- Cover the self-made form with the resulting papier-mâché and wait for the mixture to dry completely.
- After drying, the resulting workpiece must be carefully removed from the base so as not to spoil the outline.
- We make the necessary holes for the ties so that the mask can stay on the face.
- Then you can decorate the mask, according to your wishes and the chosen outfit.

How to color a papier-mâché mask
Before decorating the resulting workpiece, it is necessary to apply the outlines of the desired shape to its surface using a pencil or felt-tip pen. Next, along the outline, carefully cut out the final shape of the mask. After that, you can apply the necessary paints and decorations.
The most common design option is a Venetian mask made in the Italian style. When designing a mask, you can use combinations of several colors for the background of the mask, various feathers and ribbons as decoration.
Another of the most popular design examples is a cat (cat) mask, which will look relevant at any themed party.
The main attribute of a do-it-yourself accessory are ears, which can be made from any material or immediately give the appropriate shape to the workpiece.

Also, as an imitation of animal fur, you can use ordinary feathers for decoration or artificial fur.
For boys, the most relevant outfits are the images of superheroes (Batman, Spiderman), the main attribute of which is the mask. Having looked at the faces of the characters, you can try to make their masks using the papier-mâché technique, the main thing is to use an identical color scheme.
The listed examples are not the only options for decorating carnival masks with your own hands, for example, you can choose an African style using a brown palette and stretch the shape of a mask, or create your own, embodying your imagination and sense of style.
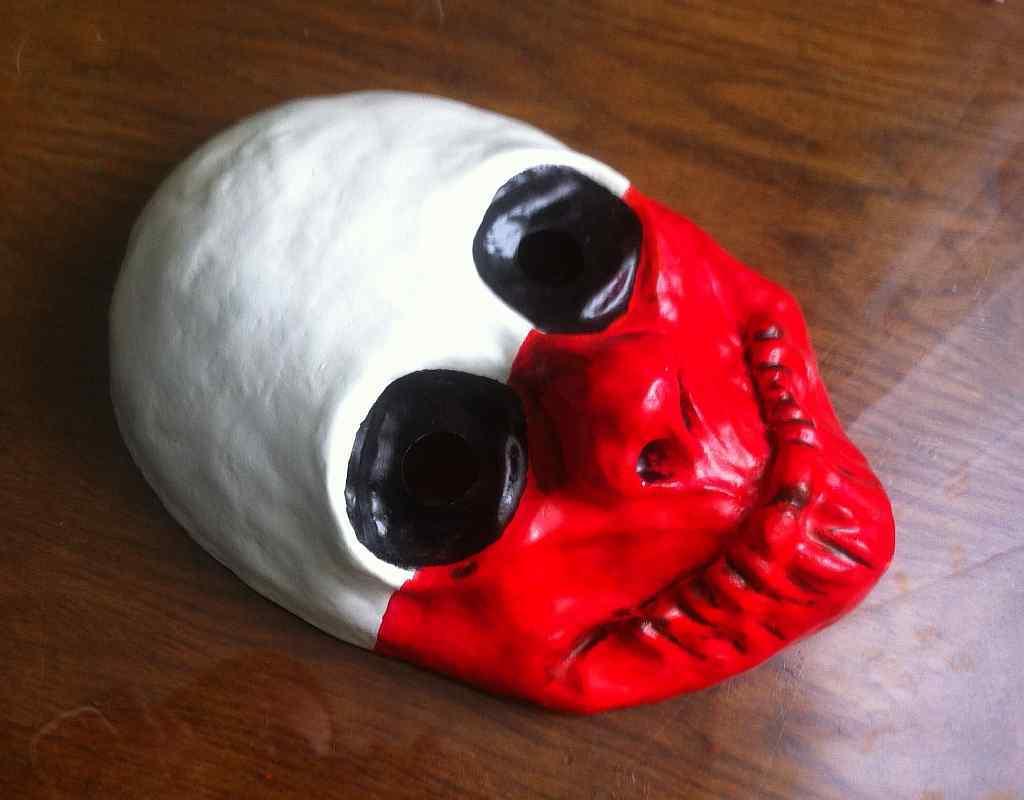
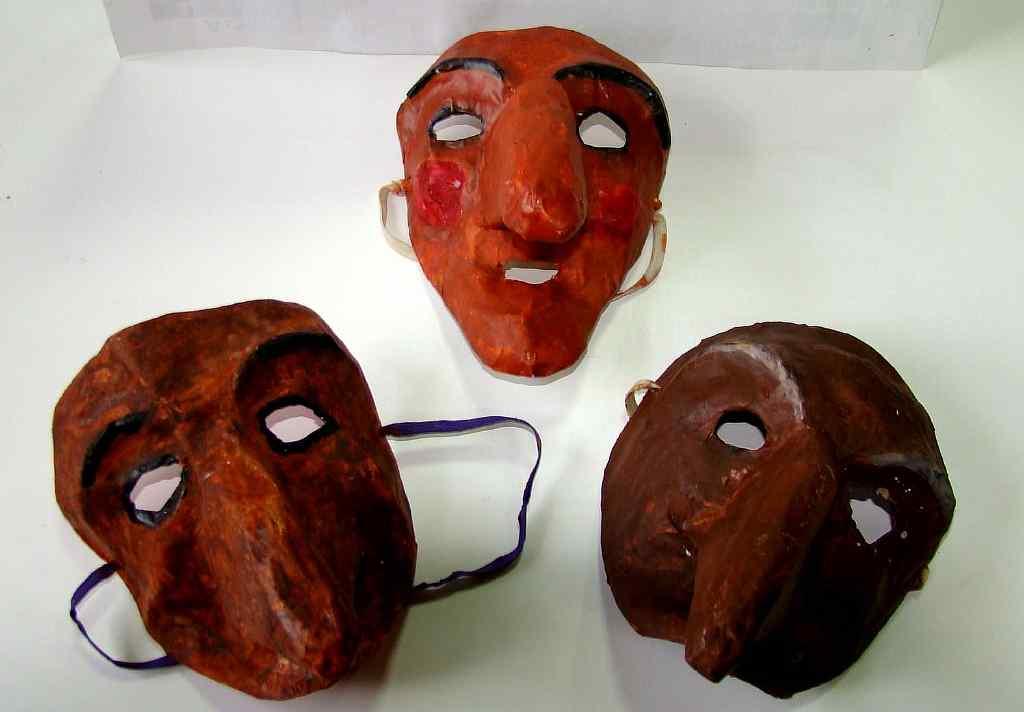
Papier-mache masks from the USSR
In the Soviet Union, carnival masks were an attribute inseparable from the arranged New Year trees, children's matinees and carnivals. Most often, at these festivals, one could meet various animals (bunnies, chanterelles, cockerels, bears, wolves) and fairy-tale characters (Babu Yaga, Koschei the immortal, Chipolino).

A feature of such masks was the bright saturated colors used to decorate accessories.
DIY papier-mache masks (video)
Today, such masks are very rare on store shelves, most often they can only be purchased from individuals who have preserved such masks. But if you really want to make a splash at the upcoming event, then you can try to reproduce this accessory yourself. To do this, you need only a little free time and the ability to work with your hands and papier-mâché masks in the style of past years will make a splash at any thematic event.
Examples of papier-mâché masks with your own hands (photo)


1.jpg)