16.01.2024
Making a soft toy - Hello Kitty angel. DIY Hello Kitty toy made of felt How to make a kitty toy with your own hands
Hello Kitty is a very popular cartoon character that is loved by many girls. Today we will make a soft Hello Kitty toy from felt with our own hands.
To work on the Hello Kitty toy we will need:
- thin white felt for sewing toys;
- thin pink felt for sewing a dress;
- decoration or applique for a dress;
- floss threads in black and yellow;
- wooden stick;
- threads;
- glue;
- scissors;
- needle.

Master class “Do-it-yourself Hello Kitty toy made of felt”:
1) Cut out a template from paper.

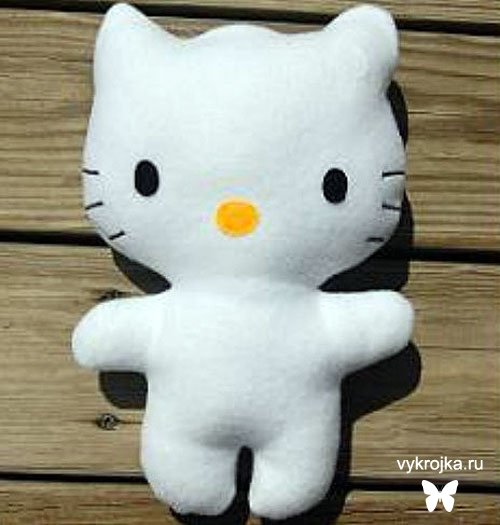
2) The toy is very simple to make, since there is only one part in the pattern. For the doll's body we will need thin white felt. We trace the pattern and cut out 2 parts.

3) Now with a pencil we outline the eyes and nose on the front part. We embroider the eyes with black thread. First we make stitches along the contour, and then we embroider the eye using satin stitch.

4) We will also decorate the nose, only using yellow threads, since Kitty’s nose is yellow. On each side we embroider 3 stripes - antennae.

5) Now we put the two parts together with the right sides inward. Sew using a sewing machine or using a back stitch. In the area of the ears we leave a hole through which we turn the part inside out. Then we stuff the toy with holofiber. A wooden stick will help us fill the legs and arms well, with which we can fill the farthest corners with filler.

6) Then carefully sew up the hole with a hidden seam.
Now all that remains is to dress up Kitty. For the dress, take pink thin felt. Cut out 2 pieces from fabric.

7) We place 2 parts on the body of the toy on one side and the other and sew them together with a loop seam, first in the area of the shoulders.

8) Then use the same seam to sew the sides of the dress.

9) Kitty definitely needs to make a bow. To do this, cut out a rectangle and a small circle from the same felt as the dress. Cut off the corners of the rectangle.

10) We collect the middle of the rectangle and sew it with thread.
Craft Hello Kitty is popular as a famous cartoon character, so she can be seen in different images, besides the cartoon: a drawing on a mug, on clothes, on a handbag, etc. Including Hello Kitty (Hello Kitty) you can easily make yourself at home.
A soft toy or Hello Kitty made from felt would be great.

To sew from felt, you need to find felt fabric, prepare threads, a needle, scissors, and filler for a voluminous craft.
In order to sew a soft toy, first of all, you need patterns. You can find a variety of patterns on the Internet for any toy.
You can also try to draw Hello Kitty yourself and transfer the drawing to fabric.

There are enough patterns, you can choose any one you want


Hello Kitty - bee


The pattern should be transferred to paper, cut out the parts and attach them to felt fabric, trace the outline taking into account the allowance, cut it out, then sew the parts together, leaving the unsewn part for the filler. Next, put stuffing inside (sintepon, cotton wool, etc.), heal and then the toy Hello Kitty from felt ready.

Except felt affordable to sew a soft toy Hello Kitty from any fabric and socks, make Hello Kitty from paper using the modular origami technique, from cake fondant, from polymer clay, from plasticine, from multi-colored rubber bands, from thermomosaics, and also sew a Hello Kitty handbag or make a knitted handbag, Kitty pillow, etc. You can also make a Hello Kitty cake or buns, Hello Kitty edibles, cupcakes, cake pops and various sweets. If you really like the image of Kitty, you can celebrate your birthday in Hello Kitty style.

A cat from a famous cartoon Hello Kitty Can make from felt. First we need Pattern.
We choose the appropriate one. Then we apply a piece of paper to the monitor and translate it with a pencil. Then we transfer the pattern onto felt. We cut the blanks and sew them on a sewing machine or by hand. We stuff it with padding polyester and don’t forget to sew up the holes. Then we embroider Kitty's face and paws.


Master class on sewing Hello Kitty with your own hands

You can decorate your purse with this cat or hang it on a New Year's tree or decorate your purse. You can also give it to a fan of this cartoon.
Video master class on how to sew Hello Kitty from felt with your own hands
It seems that Kitty is one of the most popular characters, including in the toy world.
And there are already a great many patterns. But I, nevertheless, decided to make a pattern myself and sew Kitty with movable arms, legs and head. I used this picture as a basis:And this is the pattern I came up with. I made the first cats without shoes; I completed the shoe patterns later.

In order to sew Kitty, you need to prepare the following materials:
White fleece or velor for all parts of the cat itself.
Fabric for the dress (at your discretion), lining fabric if necessary.
Felt for shoes.
Plastic from a stationery folder for soles (inserts in feet and shoes).
Synthetic fluff for stuffing.
Accessories: ribbons, pendants, bows, flowers.
Nose sculpting compound (or yellow felt)
Oval black buttons for eyes (or black felt).
1. Now start cutting. From white fabric, cut out all the details of Kitty. From the fabric for the dress - one piece of the dress with a fold, the clasp will be at the back. To finish the edges of the dress, you can use the “double dress” sewing technique; this does not mean that it can necessarily be worn inside out, so choose the most suitable companion fabric for this. You can also finish the edges of the dress by piping or tucking them. It all depends on the type of fabric. It’s easier for me to sew a double dress than to fold small armholes and necklines
Cut out shoe parts from felt. And the insoles for shoes are made of plastic. They need to be cut a millimeter smaller in circumference according to the sole pattern. Also cut out two smaller pieces from plastic according to the foot pattern.

2. Next, sew up the darts on the head and body parts. Sew the ears, turn them inside out, baste them to the head and sew the head together, leaving an opening at the bottom. Sew the arms, tail, torso. When sewing the legs together, leave a turning hole right above the heel to make it easier to place the plastic foot piece inside later. Sew in fabric feet. Turn everything out.
For the neck joint, select a wooden spool of the appropriate size. As you can see, they come in different thicknesses and heights. To wrap the spool in the same color as the main fabric, use a rectangle of white felt.

3. Then fill all the parts with synthetic fluff. Before stuffing the legs, place the plastic blanks in the legs, lightly coating them with Moment-Crystal glue. Sew the holes on the arms and legs with a blind stitch.
Cover the reel with overlapping felt.

4. Design Kitty's face. The nose can be molded from the hardening mass and glued, the eyes too, or cut them out of felt, glued, stitched along the edge and varnished. Embroider the mustache with thick black thread. Sew or glue the bow. Now you can buy ready-made ones in stores. In the absence of such, you can do it yourself.

5. Now attach the head to the body. To do this, gather the neck holes of the head and body with a strong thread, insert one edge of the spool into the body, tighten the thread tighter, tie two knots and hide the ends of the threads in the body. Then insert the other end of the coil into the head and then do the same as with the body. Then, using a large needle, piercing the body and head from the outside, distribute the stuffing inside, around the ends of the coil, so that it holds there more tightly.

Kitty can also be assembled using classic hinges - discs and cotter pins. But then it will be stitched and assembled in a different order. There is a lot of information and master classes about this on the Internet.

7. The Kitty herself is ready. Move on to clothes and shoes. Glue the plastic insole to the sole. Next, sew the top of the shoe and soles using a blanket stitch. Sew the back edge of the shoe and use the same overcast stitch along the top.

8. Shoes can be decorated, for example, with textile roses. At the beginning, I prepared red roses, and bows with blue and pink ribbons. Because I wasn’t sure about the final version of the image. In the end, I chose blue bows, ribbons and roses.

9. You can sew the dress as you like or the way I did it. Place the dress piece and piece of companion fabric (lining fabric) face to face. It is not necessary to cut out a part from another fabric; it is enough to cut out a rectangle on which the part of the dress itself will fit.
Sew the piece along the contour, leaving a hole in the back edges.

10. Turn the dress inside out through one of the holes. Then be sure to iron it.

11. Topstitch the dress around the hem, again leaving the back seams intact. Sew the hangers with a hidden seam.
If you are sewing a dress with sleeves, then this option for processing the armhole will not work. You need to use a facing or hem, and sew in the sleeves, possibly by hand.

12. Try on the dress. You need to mark the places where the tapes will be attached. Place the edges of the ribbons into the holes in the cuts, tuck the edges inward along the entire cut, and carefully secure with cobwebs (or glue). Take the ribbons to the length you measured; it’s better to cut off the excess later.

13. Now set aside the edges and the cuts on the back along with the lines. Make air loops and sew on matching buttons, so that there is room for a tail.

14. Trying on again. Everything fits as it should, the tail goes between the buttons. Everything is fine.
I sewed this pussy in a hurry, time was running out, so I chose the option without sleeves and with a clasp all the way through the back. If there is nowhere to rush, then I make a fastener on the floor of the back, and lower in the dress I make a hole for the tail, finishing it with a facing. But, more on that later.

15. Tie the ribbon in a neat bow at the front and, if desired, secure it with glue or thread.

Well... hello Kitty! That is, HelloKitty!


My first Kitki were without shoes, as I already wrote.
This one had a dress with sleeves, I made the bow myself, attached it to a pin and it was removable. The dress is decorated with a snowflake made of glitter, which I cut out from nylon tape and then glued on.
I made the nose and eyes from buttons. The black buttons are oval, they just had to be filed down to the right size. But the yellow one was big and round. To begin with, I had to bite it with pliers and outline the desired oval. Then sand the future nose long and hard.
And, just the same version of a ponytail through a dress:

This is a version of a cat with felt eyes and a nose, not covered with varnish. The bow is also removable with a pin; I used a children's hair clip. The dress again has sleeves and is decorated with adhesive rhinestones.

Here's a New Year's Kitty with a homemade Kitty bow. I have already put on several noses and am using them. The eyes are made of oval and filed buttons. The dress with sleeves is decorated with a herringbone appliqué with rhinestones.
All of these cats' dresses had holes for tails. And here shoes decorated with snowflake sequins have already appeared.

There is still a sculpted nose and button eyes (which ended with this kisula). The dress already has a clasp all the way down the back and was decorated with a metal “Kitty” pendant. And I sewed the organza sleeves by hand. The bow was again a former children's hairpin and matched the color quite well.

Create, experiment, try something new!
All children love when they have something unusual, something that others don’t have. For example, an original pillow. It will be in only one copy and only in his possession. You can, of course, buy such a pillow, but no one can guarantee that there is only one, so I suggest sewing it yourself. First, let's decide what we need, that is, what materials and tools we will need. So, we need to purchase fleece fabric in different colors, I took pink (fuchsia), lilac, white, black, yellow, light pink; filling, threads, the same colors as the fleece.
Draw a picture on paper measuring 38*55. We make a template of what the pillow will look like. For the drawing, I took the cartoon character “Kitty.” This is what I came up with.
I transferred all the details onto a blank sheet of paper and cut them out. The result is patterns that are very convenient for cutting from fabric.


First we cut a 38*55 rectangle from pink fleece, we will need 2 parts, since the pillow has 2 sides.

From white fleece we cut the cat itself and daisies.

From black we cut out the eyes and antennae.

From light pink fleece we will cut out a rectangle measuring 6*8 - from it we will make a bow on the chest of the pussy.

The details of the nose and the cores for the daisies will be yellow.

Only the lilac fleece parts remain. They will be a sundress and sandals.

All the details have been cut out. Now we start assembling the pillow, namely, we begin to assemble our kitten. To begin, we sew on the white base of the kitten and place the daisies to the left of it.

Now we sew on the yellow parts - the cores of the daisies and the cat's nose.

It's time to create a face for our pussy. To do this, we sew on the nose and antennae. We try to position the antennae symmetrically relative to each other so that the pussy is even and neat.

All that remains is to dress up the pussy. Sew on the sundress and sandals.

Well, the front side of the pillow is ready. Now we assemble the pillow itself. Place a second rectangle of the same type on the resulting part and stitch along the edge. A small incision should be left unsutured on the side. Through it you will need to turn the pillow right side out.

We turn the part inside out.

Now let's make a voluminous bow on the chest, or rather on the kitty sundress. To do this, take a light pink rectangle that we cut out in advance. Fold it in half and sew along the edges.

As can be seen in the picture. The bottom section is left unsewn so that it can be turned right side out. After we unscrew our bow. You should make a line in the middle using a low thread tension. This is done so that the middle of the bow can be pulled off.

Pull the thread. But at the same time, secure it on one side with knots, that is, tie them. After tightening, tie it on the other side.

We manually sew the resulting bow to the cat’s sundress. We stuff the pillow with filler and sew it up.

In the same way as we made the bow, we make a larger bow. For it we take only a 10*12 rectangle. Sew the resulting bow onto the pussy ear.

The pillow is ready! Now you can sew such a pillow for your little child. Kitty (master classes, patterns, ideas)
Kitty (master classes, patterns, ideas)
Master class No. 1
All pictures enlarge by click

And here is the actual pattern of this pink girly friend :)


The photographs of the pattern are clickable and are designed for printing on A4 sheet. To zoom in, I recommend using the Paint program. A continuation with the master class itself will definitely follow.
Kitty: master class (part 1)
As promised, I’m starting to post a master class on sewing Kitty. Today the first 2 lessons: cutting and assembling the head.
To sew Kitty, I used white velor with the shortest pile and pink polycotton. This was my first experience of “communication” with velor and I was delighted; I shouldn’t have avoided it for so long. The fabric is very pleasant to the touch, practically does not fray, sews with a bang, and what is very important (especially for novice needleworkers) forgives many flaws of not very even stitching and assembly due to the knitted base and fleecy texture.

Polycotton is a separate matter. For these purposes, you can use any cotton of a suitable color. But I preferred polycotton for several reasons. Firstly, this fabric does not fray at all and you can leave minimal seam allowances and the edge does not need to be processed. Polycotton does not stretch, hardly wrinkles and holds its shape perfectly (and if you wash it first, it is even more pleasant to work with). Because I sewed a toy for a little girl, the dirt- and water-repellent characteristics of this material played a significant role. Well, for many, its biggest advantage is its fairly low cost with excellent characteristics and a very pleasant appearance.


Photos are enlarged for detailed examination and are intended for printing on A4 sheets.
Continuation (lesson 5-lesson 8) in the next post. Kitty: master class (part 2)
Another Japanese kitty Height 25 cm.
Sewn in one piece according to this pattern.
Eyes and nose made of plastic. A sundress made of jeans, a flower painted on the fabric.
The toy is one-piece, so the pattern is not at all complicated and can be enlarged very easily. A 9-10 year old child can handle sewing quite well.
We will need:
- White fabric
- A piece of black and yellow fabric
- Scissors
- Black and yellow threads
- Padding
Pattern:

Toy diagram

Kitty pattern
Cut out Kitty from paper. We cut out the eyes and nose.
Place it on the fabric and trace along the contour. Cut out one piece. Then we also outline the second one, only on this detail we outline the eyes and nose with a simple pencil. Cut it out.
Cut out two eyes from black fabric. We sew them with black threads on top of those drawn in pencil on the details. Then we cut out a nose from yellow fabric and sew it with yellow threads, also on top of the drawn one.
We embroider the antennae (you can just use a stitch).
Now we take two parts of Kitty and put them “face to face” (so that the muzzle is inside). Sew along the edge, leaving a piece between the ears unsewn.
Turn inside out using a pencil or stick.
We stuff the toy.
Sew up the hole between the ears.
You can sew a bow on Kitty or sew a dress.
Download the Kitty toy dress pattern for free from pattern.ru:
kitty.rar (downloads: 1596)
Master class No. 3
Kitty made of felt
More patterns


This is not a copy of a popular toy, but Tatyana Brazhenkova’s own take on the toy. Anyone who has known Tatyana for a long time knows for sure that she creates her patterns from a picture and, at the same time, her patterns are always easy to work with, very accurate and the toys turn out better than the original.
Here's Kissy - a completely different look at the pattern, everything is extremely simple, and at the same time I even wanted to add a toy to the company of blue-nosed friends - a very similar author's handwriting. I even agreed on this issue with Tatyana, but today I decided to show you the pattern in its own form.

You know, your favorite toys can also be sewn in the style of Teddy bears. Here is an example of a popular toy sewn in exactly this way. All parts are assembled using hinges, so your Kitti can take any pose and even turn her head left and right. It is best to sew a toy from fleece or white velsoft. It is better to use plastic eyes (you can find them in many fabric stores or in the online store). The nose can be sewn from a piece of yellow fabric. Sew the dress from bright soft material, fasten with three small buttons on the back. Please note that there is only one dress pattern - one piece for the front, and two parts for the back. Make an applique on the dress in the form of a large flower.

Everyone's favorite funny little cat character is now available in pattern form. For work you will need white fleece and some pink fleece for the dress and bow. Sew all the details, decorate the head: glue or sew on eyes and mustache strips. Don't forget about the small nose, which can be cut out of yellow material. Sew the bow, turn it inside out, pull it in the center and decorate with a brooch. Sew the dress along the side lines, put it on the finished toy and fasten it at the back with small buttons (can be bought at fabric stores). Secure the arms and legs with a rope hinge if the toy is small or with hinged discs of a suitable diameter.
The toy is ready. Now do an experiment and sew the same one from white fur.
...and a lot of ideas


